Busy To Fall Wind Calendar Up Year
- Davenport Antique Motorcycle Meet – Labor Day weekend, August 30 thru Sept. L at fairgrounds in Davenport, IA
- Chicago Area Picnic and Ride – Sunday, Sept. 8 at 8 AM Nate Palmer and Art Rice are sponsoring a ride around the quiet back roads of Barrington Hills, followed by a picnic. They will furnish the hot dogs, hamburgers and pop. Riders and families should bring potluck salads and deserts. Ladies can also enjoy a private tour of an Amish Quilt shop. See map inside. Phone Nate at (847) 382-3055 or Art at (847) 38L-6380 for more information.
- 12th Annual Bucyrus Meet – Sept. 6 &7 Crawford County Fairgrounds, Bucyrus, Ohio. Phone Keith Naufzinger for details (419) 562-8875
- 4th Annual Whizzer Picnic and Ride – Sunday, Sept. 22 at 10:30 AM at Reg Williams Whizzer Barn and Fairgrounds, Serena, IL. One mile west of Serena on Rt. 52. Swap meet, crafts, short ride at 1:00 PM, hot dogs, chips and sodas, etc. Phone Reg at (815) 792-840L for details.
- Woodstock Antique Motorcycle Meet – Sunday, September 29, County Fairgrounds in Woodstock, IL Phone Tim Smith at (630) 231,-5877.
- John Zito Swap Meet – A new time and place are going to be announced. Call john at (630) 456-6122 for details.
- Memory Lane Fall Open House – No information as of this printing, but has been held in October in the past. Call Larry or Harv at (419) 874-4501,
Final Installment of Barn Fresh to Fresh Overhaul
The moment of truth had arrived. I had all my parts cleaned up. The cylinder bored out and valves installed. The head, case, side cover, flywheel and other castings all shiny bright. And a goody box full of new and refurbished parts.· So it was time to begin the final assembly and long-awaited test run.
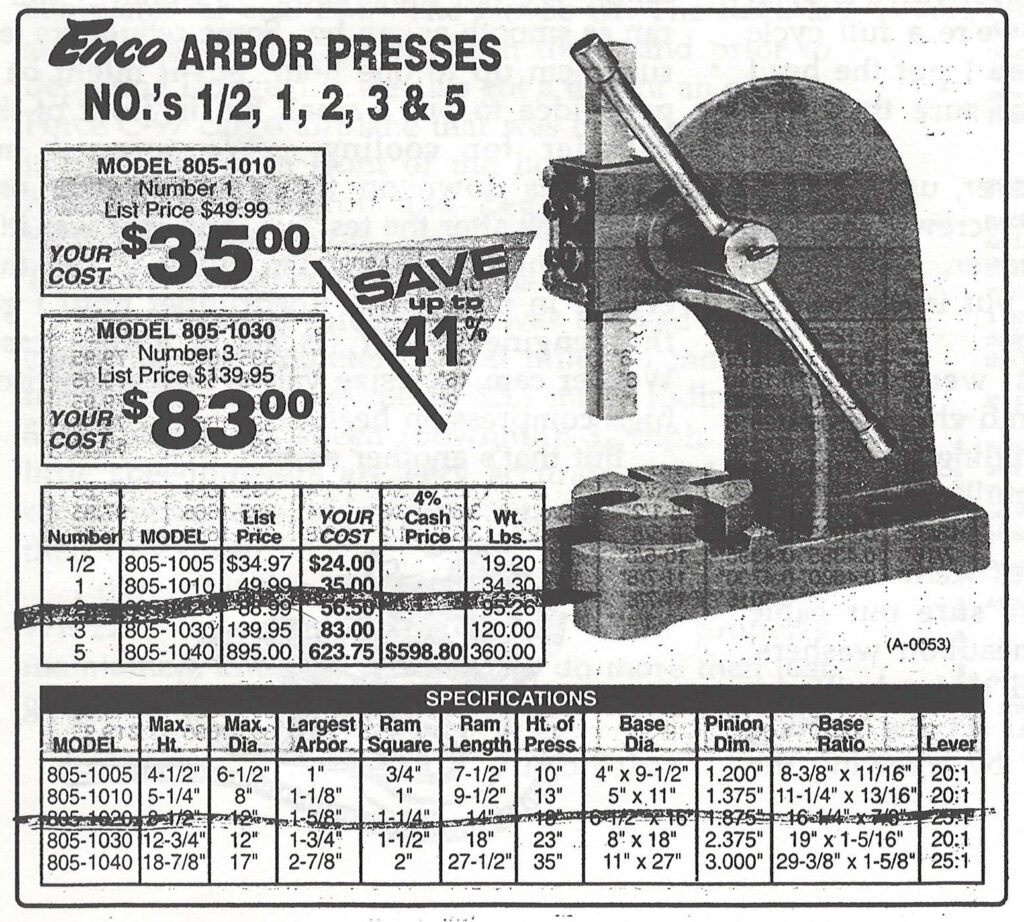
We began building up the lower end by installing the crankshaft oil seal and main bearing. For the longest time, I had been admiring Al’s bench top arbor press and finally I had a good excuse to buy one. Besides, the price was right — only $56 from the mail order outlet. The #2 model I bought from Enco could apply an even force of up to two tons, and it sure beats pounding parts in with a hammer. Besides being able to remove and install things like bearing flanges and bushings, you can also use it to straighten or bend small parts. I also am in the process of turning alum and brass rod stock on my lathe to make tools to fit the diameters of the various bearings on Whizzer motors, such as the side cover needle bearing, etc. These are turned to fit the outer race, with a slight undercut on the inner race so you won’t damage the ball bearings or raceways.
First we installed my main bearing oil seal (Chicago Rawhide part # CR9876, available at most bearing stores, such as Berry Bearing for about $6-8). It’s important to start this straight, so don’t even try to tap it in with a hammer. Just one quick move with the arbor press handle and it was perfectly. flush mounted in the bearing flange.
While we had the bar stock flats set up on the arbor press table, we also installed the Torrington M-12101 needle bearing in the side cover. These used to be real cheap, on the order of $3 to $5 each. But the supply recently dried up and the latest price is now around $25 each! We finished up the lower end of the case by firmly seating the main bearing (part # SKF b205 JEM) with the press.
Al likes to assemble engines in his test stand. But before we could mount my case we had to replace a missing engine mounting stud in the bottom. These are not off-the-shelf items, so we had to mooch one from an old case that had a thrown rod through the casting. Al double-nutted the fine threads and put some Locktite on the coarse threads before bolting it in place.
Next we put some Locktite on the bearing flange screws and conical washers. You don’t want these working their way out and scoring the inner face of the flywheel.
Now for the crankshaft. I had what looked to be a NOS standard crank, but 40 years of crud was baked in the cosmoline, so it took quite a bit of thinner and scotchbrite to clean it up again. Don’t forget to clean out the center hole with a bottle brush, too. If you’re sending out a used crank to be . reground, carefully check the end that goes into the needle bearing. If it’s pitted or worn, you can have a special hardened bearing end installed called an IR88. Also, check the small gear on the crankshaft to make sure it’s all the way home and not wobbly. If it is, you can locktite it and center punch it in 2 to 3 places.
Next we installed the crank in the main bearing. The old Whizzer dealer manuals show special wedges that were placed between the counterweights to keep from distorting the crankshaft when pressing it in, but not everybody has access to the real Whizzer tools. So Al came up with a nifty little tool you can make out of $2 worth of steel plumbing pipe and one of the long Sportsman kickstart bolts. (see Bob Baker Newsletter #18) The idea here is to pull the crankshaft in rather than push it, and it works just great. But before you use it, check to make sure the bolt threads easily down in the crankshaft end. If not, solvent and an airgun might do the job, or you may have to resort to a 3/8-24 left hand thread tap (yes, they do make such a critter). Another thing, Al likes to use a little assembly lube when fitting close-fitting parts together. His choice is GM E.O.S. (for Engine Oil Supplement) but you can pick up most any kind from a parts store. Put a little on the crankshaft where it pulls tight through the seal.
With the crankshaft in, we were now ready to install the connecting rod. Put a little assembly lube on the inserts and snap them in place (don’t use grease — it might clog the tiny lubrication hole). Be sure and get the screws in right, the long bolt through the open hole, and the short one in the blind hole. Interestingly, these are not simple cap screws you can buy in the tool supply store, but special Whizzer aligning screws. You’ll notice there are no threads where they go through the rod and cap. Go easy with them — they’re in short supply. Lastly, safety wire the cap screws with .032 stainless steel wire, making sure the wire is such that it pulls the bolt tighter when you pull on it. Also, make sure the cut end does not rub against the counterweights when you rotate the shaft.
Next we installed my flywheel. You want to check on inside of your old flywheel to make sure there it’s not jimmied oversize. What happens is the flywheel would have wobbled, formed a big lip down on _,,the bottom. Get in there with a scraper, and scrape some of that off. Al also cuts his keys longer than the original, to grab a little more of the tight original keyway if there is some wear.
“Lock washer on flywheel? Look at this” Al pointed out. “See how thin this washer is? If you tighten it down it’s gonna cup and sometimes they split. That’s why Whizzer came out later on with a heavy duty flywheel washer… you can get them repro now. Quarter inch thick. Curved side goes out, sharp side in. Just locktite instead of lock washer and you’re all set.” The Grade 5 bolt calls for approximately 50 pounds of torque to tighten flywheel bolt.
Now for the only tricky part in assembling a Whizzer engine — choosing the correct thickness end spacer washer. There’s only one way, and that’s to use the special Whizzer crankshaft end spacer tool. The spacer washers come in different thicknesses (I think they’re in .009 steps) and are identified by letters — A, B, C, D and E. If you don’t have one of these tools, you’ll have to call around and arrange to use one. Once you’ve measured with the tool and selected a washer, “glue” it and the little camshaft spacer in place with some white lithium grease and start putting the sidecover on. How do you know you’ve chosen the correct thickness spacer washer? (Sorta of like, “how do you know the light goes out when you close the refrigerator?) Al keeps rotating the engine as he goes around tightening the sidecover up. He says he has run into warped sidecovers and could feel the crank binding up as he tightened the screws down.
After we finished with the sidecover, we rotated the engine without the head to adjust the valves. Set flywheel at IGN TC for top dead center. “But look, exhaust valve is open so we’re not really at TC, we’re a full cycle out. I usually do this before I put the head on, that way you-know for sure that both your valves are closed.”
When installing valve cover, use the 3/8″ screws with tin cover, 1/2″ screws with the aluminum spring-loaded cover. On the H cylinder, you also want to put in the intake tube restrictor – it runs better.
The piston and rings went together without a glitch. Be sure and check the end gap on your new rings by sliding them in the cylinder and measuring carefully according to specs.
The rest of the accessories went on pretty straightforward. We made sure our cable adjusters were under the headbolt washers. not on top. I had cleaned and rebuilt my carburetor at home, and Al set the starting adjustments. He started by screwing the
high speed metering jet on bottom all the way in, then backing out 3/4 turn. The low &peed screw starts out about 1-1/4 turn. We also double-checked to make sure my float was level. Good thing, it was bent so the float went too high. If your float bowl gasket doesn’t fit on easily, wet it first to soften it a bit. Sometimes the old ones shrink.
We installed my coil, making sure we inserted little spring shims were in place and soldered on my leads. Shim stock between E-frame and flywheel — .012 brass. We also installed a new set of GM points. Al says, as long as there are old Chevy’s running, there will be old Whizzers running.
Everything was all set up on test stand. Joe Cargola stopped by just as we were getting ready to fire the engine up. Funny thing, Joe’s been in the hobby as long as any of us, and he still gets excited when you test run an engine for the first time. He was grinning like a Cheshire cat. Besides, I enjoyed having another witness to this great event.
And wow! It started right up! (sounded like a popcorn machine on my interview tape) We ran mine about 15 minutes and it ran as smooth as can be. Some rebuilders test run them up to one hour, but it might be a good idea to put a small fan in front of the cylinder for cooling. We torqued my headbolts down on the copper gasket one more time after the test run, and that was it!
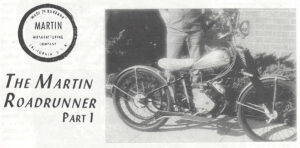
For the time being I’m going to run this engine in my Martin Roadrunner until I get that engine rebuilt (It has a 4-digit case, Webber cam, oversize valves and a Morrison high compression head).
But that’s another story
154 Mile Overnight Whizzer Ride
One of the more adventuresome rides this year had to be this two-day trip in June set up by Bob Baker. The following is a report he sent in for you readers:
“With the temperatures in the low 50’s, eleven riders set out from Rockton, Illinois on June 8 for Dodgeville, Wisconsin and a tour of the House On The Rock Museum.
Although the weather was a little brisk, everyone enjoyed the 77 mile ride to the motel in 5 hours and 30 minutes, with two rest stops and a lunch break along the way. For our return trip the next day, the weather was a little warmer and we made it in 4 hours and 30 minutes, with 2 stops and lunch.
About 8 miles into the Saturday ride we ran into our first obstacle. We had to ford a creek (8″ deep) that had overflowed its banks and was running across the 2-lane blacktop. Although the bikes and riders got a little wet, we had no problems from this episode.
It was a very nice ride and our only mechanical problem was when one bike lost its brakes. But we had a spare bike along, and the last 40 miles was completed at 2:20 PM. The House On The Rock is sensational if you haven’t been there, and prior to departing Dodgeville we also got a tour of an old Air Force C-97 cargo airplane that was built in 1952 and is now sitting in front of the hotel. Riders were: Nelson, Rice, Legron and Legron, Harmon and Harmon, Zoss, Baker, Smith, Palmer and Pagels. Three wives also accompanied us on the trip.
The following information was derived from an electronic speedometer. Total miles to motel and return: 154. Average speed: 25.1 mph. Riding time: 6:06. Maximum speed (downhill): 37 mph. These little speedometers are very accurate and I would recommend one to anyone who wants to know their true speed.
I think that this ride brought out the fact that the Whizzer is a dependable motor when properly maintained, and was designed to do more than just go a couple of laps around the block on occasion.”
-Bob Baker